
Step by Step Tutorial: How to Balayage Your Dark Hair at Home
Step by Step Tutorial: How to Balayage Your Dark Hair at Home
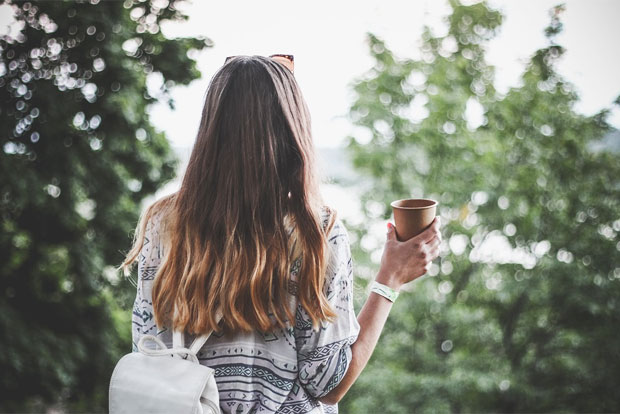
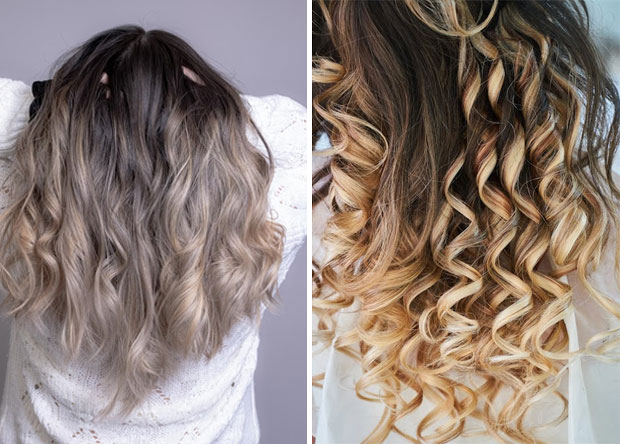
You’ve probably seen balayage hairstyles all over your Instagram and other social media accounts. It’s the latest and greatest dye job featured by many hair stylists on their pages. A sort of hybrid between an ombre and highlights, a balayage is actually just a term for the technique used to dye the hair. In French, it means quite literally to “sweep”. A beautiful lifted and layered depth can take affect when the dye is painted on to the hair.
The look can be achieved on your own hair or extensions if you have them. Curly Human Hair Wigs look amazing with balayage!
Hair stylists take pride in the clean gradient that can be showcased with a good balayage dye- but they can charge hundreds of dollars. Luckily, this look can be easily achieved at home.
How to Balayage Your Dark Hair at Home
Here are some easy steps to DIY balayage your hair at home:
1. Gather materials
- An old T-shirt and towel you won’t mind getting dye on
- Vaseline
- Wide Toothed Comb
- Plastic gloves
- A dye bowl and paddle brush (you can usually find a kit including both of these)
- Spider clips or hair ties to help section hair
- Saran wrap / Cling Film
- Hair dye – depending on your desired hair lift, several options are available. There are a few balayage kits on the market you can easily choose from.
- Toner – This will remove the yellow or brassy tones that can happen after a hair lightening. You can also invest in a toning shampoo and conditioner.
You’re always going to want to remember that the color you choose on the box dye will have to reflect the color your hair is now. For example, if your hair is black or dark brown, don’t choose a platinum blonde or white color if that’s what you expect as your result. Usually boxed dyes will only lift your hair 2-3 shades. Balayage looks are usually subtle highlights anyways. If you want a more drastic, ombre-looking balayage (such as dark roots with silvery- white highlights) you may have to do several applications.
Lastly, you can choose a bleach kit. If your hair is severely damaged, you may want to stay away from this option. Bleach tends to be more harmful, but it lifts more pigment out of the hair. This is a viable choice if you want a more dramatic look. You can buy kits with developer and bleach together. Just remember that the higher the volume the bleach is, the more lift it has, and along with that will come more damage to your hair.
2. Prepare and section your hair
Now that you have all of your materials, set up shop in a well-lit room in front of a mirror. Your bathroom is preferable because you won’t have to worry about getting dye on a carpet. You can also achieve a beautiful balayage look on curly wigs, which can be a great option if you want to experiment with color without committing to dyeing your natural hair. Braided wigs, in particular, can provide a stunning base for a balayage style. Put on your T-shirt and drape the towel around your shoulders. Comb through dry and un-washed hair. Put Vaseline on the skin around your hairline and ears. Part your hair starting from the bottom- tying or clipping up the front of your hair.
3. Mix your dye
Put on the gloves. If you got the box dye, usually it comes with instructions saying how to mix them in the bottles. You can choose to use the bottles, or you may pour them out into the mixing bowl. Mix together the developer and color with the paddle brush. If you chose to use bleach, mix the powder and developer together until the dye is a little frothy.
4. Carefully apply the hair dye
Starting from the bottom, separate your hair into a 2-3-inch-thick layer and clip up the above hair. Dip the paddle brush in the dye and liberally start painting on the separated hair, the bottom being the most saturated and getting more and more sparse as you go towards the top. You’re going to want to avoid getting any dye on the roots. Try to paint in a gradient, making soft and loose stripes in intermittent and evenly spaced areas as you come closer towards the top of the hair. Again, try to leave at least 3-6 inches of your roots alone.
Depending on how long your hair is, make sure you blend upwards and fully saturate only about the bottom third of the hair. Put a sheet of Saran wrap over the layer of dyed hair to separate it from the new layer that will go on top of it. Repeat this process moving upwards with more 2-3-inch layers. In the spots where there are no stripes on the layer underneath, paint a stripe on the layer above it and vice versa.
Continue with this on the sides of your head with new sets of layers. You may want to let the dye go closer to your roots as you get to the strands that are closer on the hairline around your face.
5. Process
Once you are done painting, relax and allow your hair to process. 30-45 minutes is the typical processing time, but you can keep an eye on your hair to see if it has reached your desired color. You may keep it in a little longer to lighten further, but don’t leave it in for over an hour. You may also use a little bit of heat, like a hair dryer, to speed up the process. Only do this if you have particularly thick and healthy hair because it can be further damaging (you can read these reviews of top blow dryers for African American hair, just in case). Remember that the color you see is going to be a few shades darker than it will be after you rinse it out.
6. Rinse
Thoroughly rinse your hair out! You can do this in the sink or the shower. Be extra careful to avoid getting the rinsed chemicals in your eyes.
7. Toner
This step is optional. If you are happy with your results after your hair is dry you don’t have to do this. Toner is for removing the yellow tones in hair after a lightening. Once your hair is dry after the rinse, comb through again. Put on more gloves and saturate your whole head with the toner. Leave on for 10-20 minutes and then rinse again.
8. Condition and style
After the toner is rinsed out, it’s a good idea to condition your hair to help repair damage. You may use a toning conditioner if you chose to get one. Rinse, dry, and style to your liking.
Get ready to flaunt your beautiful new balayage!
Guest Article. Contains sponsored links.
Related Posts


About The Author
A Mum Reviews
This blog is edited by a mid-30s mum with over 15 years of professional childcare experience. Now 10 years into motherhood and enthusiastic about finding great products and helpful solutions for busy families to make life more fun and easier too.